
opening Monday, June 18th, 2012 – be sure to visit for many other kinds of tutorials:
Bloggers Carnival
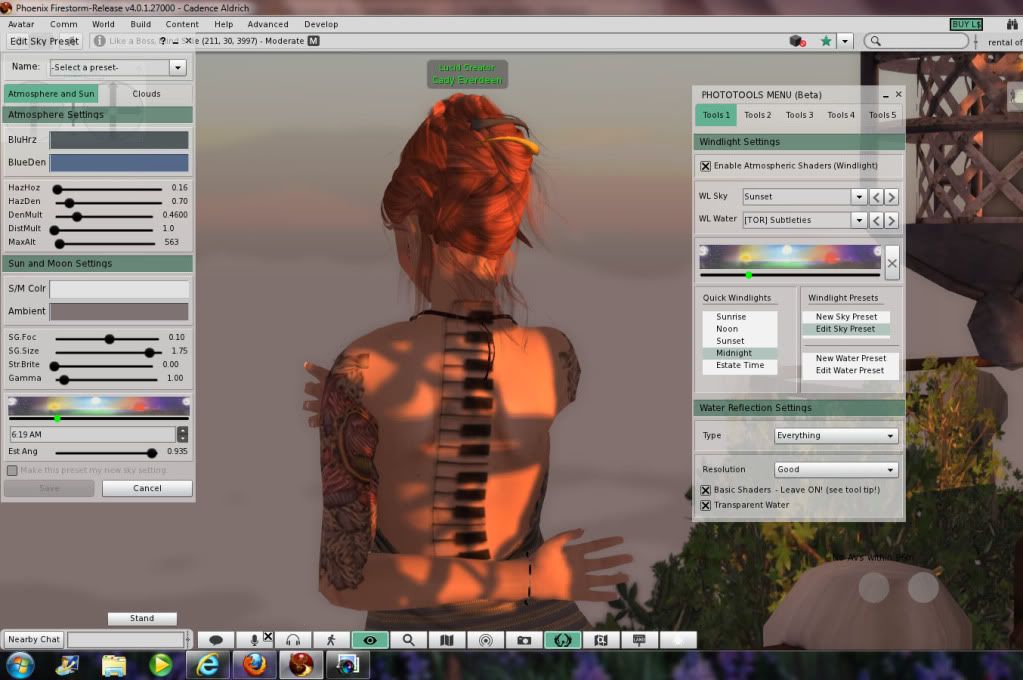
This tutorial is written using the Firestorm Viewer with the Photo Tools Beta plugin, as that is what I use personally.
Firestorm can be found here: http://www.phoenixviewer.com/
Photo Tools Plug In: http://www.fluidr.com/photos/61900109@N02/7070702407
STEP 1:
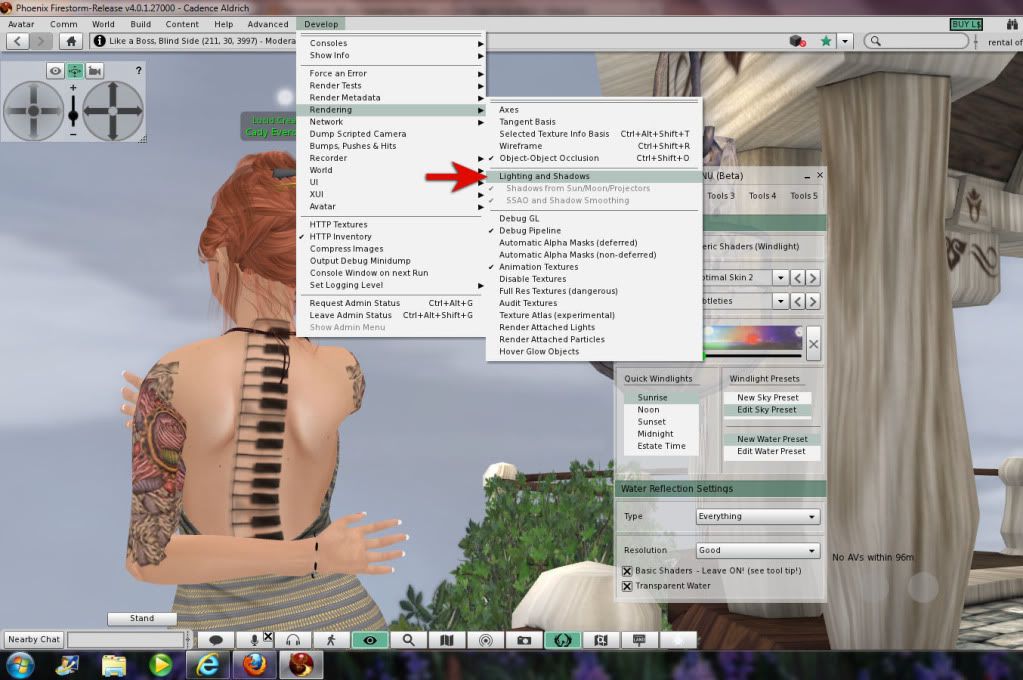
To get the Develop menu, if you do not have it already, hit ctrl+alt+q
Under the Rendering section make sure that Object-Object Occlusion, Lighting and Shadows, Shadows from Sun/Moon/Projectors, and SSAO and Shadow Smoothing are on. I normally keep all but Lighting and Shadows clicked, that way when I want to turn on shadows, all I need to do is click Lighting and Shadows.
To get the Photo Tools menu seen in the picture, click the Quick Preferences icon (the one that looks like a phoenix)
STEP 2:
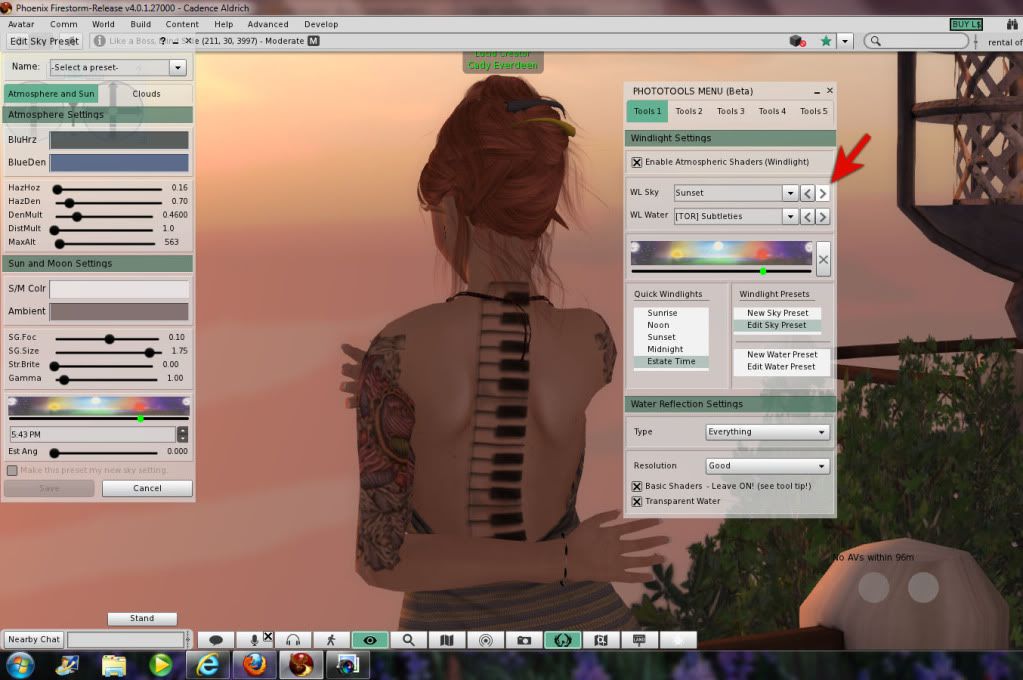
This is when I just start clicking through different Windlight Sky settings until I find one that suits the mood and the feeling I’m looking to portray in the picture.
Once I find one I think will work, I click ‘Edit Sky Preset’ to adjust the lights a bit.
STEP 3:
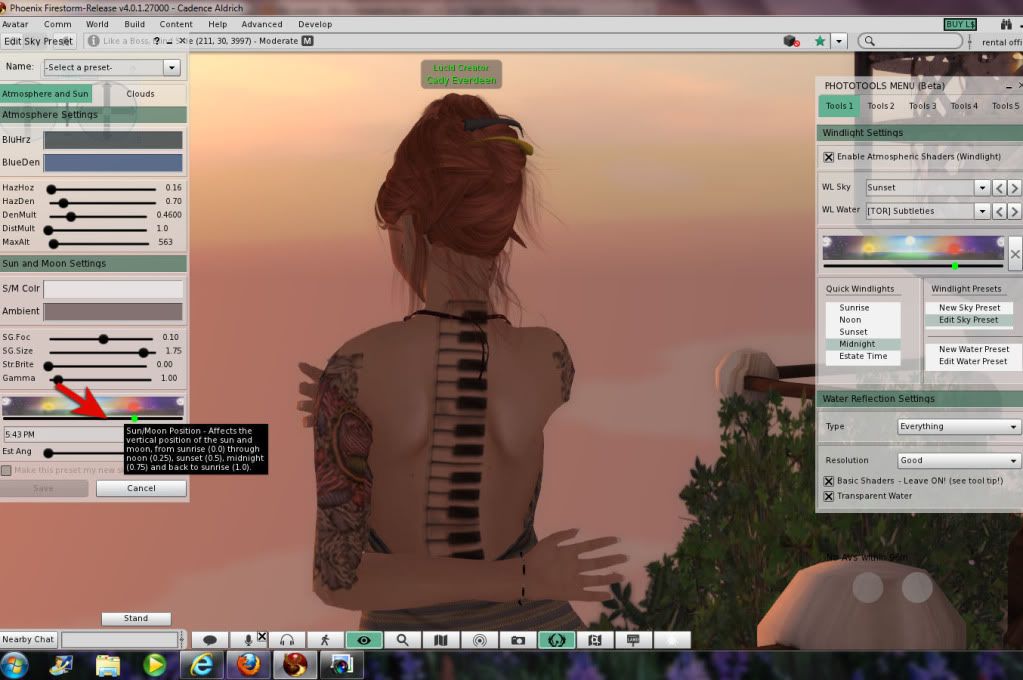
This slider moves the sun/moon position, it will change what direction the sun comes from and will have a great influence on how the shadows play in the photo
STEP 4:
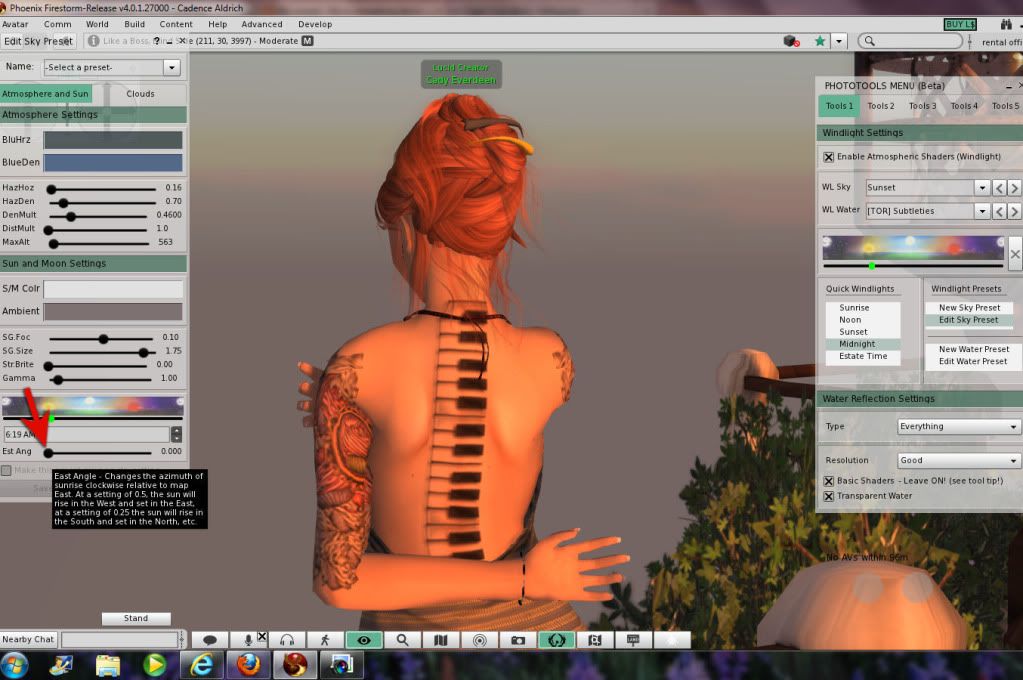
This slider adjusts the east angle, like the sun/moon position, it will determine where the shadows fall in the scene. I will often go back and forth many times between these 2 steps until I have reached the desired effect.
NOTE: You do not have to save the setting, I usually take the picture and then let the setting go back to normal.
STEP 5:
This is actually my final product, where I hit the camera button, I don’t have any special ways that I save, I use the current window, image quality 100.

Final Image
